React.js with typescript

One of the most widely used javascript frameworks is React.js, developed by Facebook it gained popularity for being lightweight, and its reactive component-based design allows the developer to split the application into the individual component which automatically changes/ rerenders on the page when related data changes. In an MVC application, it is used as V (view) of your application.
Typescript is developed at Microsoft, It is a superset of javascript and a lot of additional features to javascript. But where javascript can be directly used in projects typescript is not understood by browsers or runtime environments like Node.
When you install Typescript, apart from its libraries it comes with a Compiler, and when a .ts file is run through the compiler it generates an equivalent js file, i.e the Typescript code is converted to Javascript which can be used in your application.
Some of the features that typescript provides are:-
- Type:- you can use the built-in type in Typescript or create your own type by
Combining existing types, and then you use them, tells exactly what value should
be stored in a variable.
Some of the built-in types are:- number, string, boolean, object, Array
- Type Autocomplete:- when you use types to tell what value will be stored based
on this typescript will recommend exactly what methods can be run variable instead of showing all the matching names when you start typing a method
- Customization:- When you initialize a typescript project it will create a .tsconfig file and here you can customize how typescript will work, you can select how it will be compiled from typescript to javascript like es5, es6, etc and you can customize to your needs
In this article, we will be combining both React.js and Typescript for a todo app where you can add items to a list and removed them. We will use the create-react-app CLI and NPM for setting up the project, we can use the below command to set up the project
npx create-react-app my-app --template typescript
This will create a react project with a typescript template.
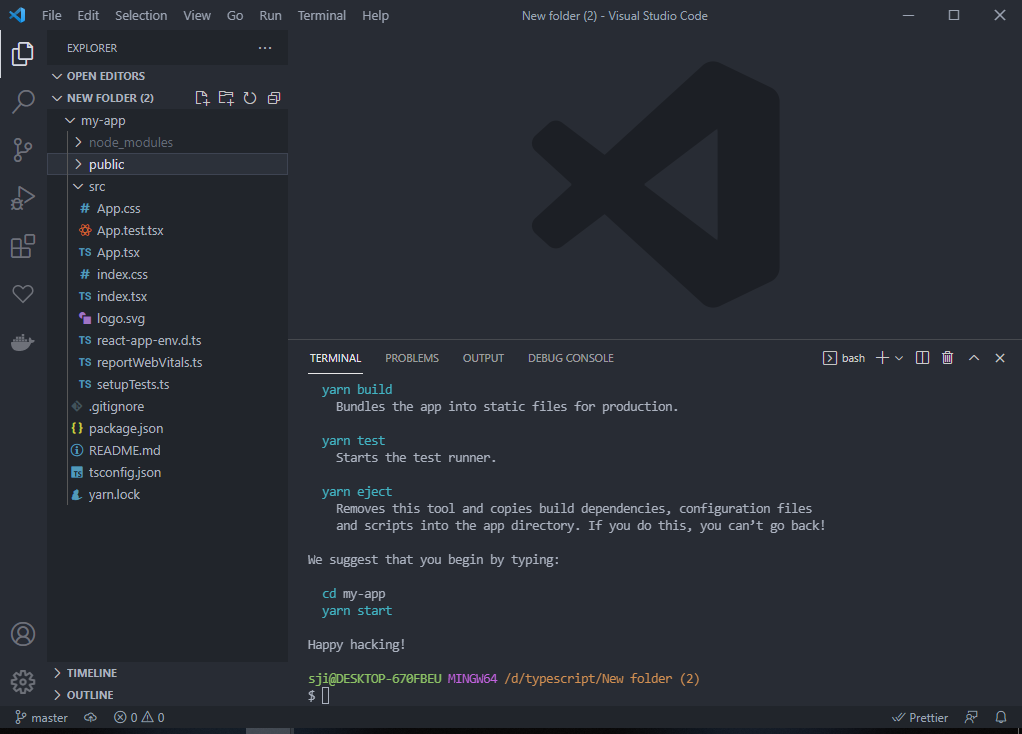
Once the setup is finished you will have a project like this, it is similar to the Normal react.js setup except for .ts and .tsx files which replace the .js or .jsx files
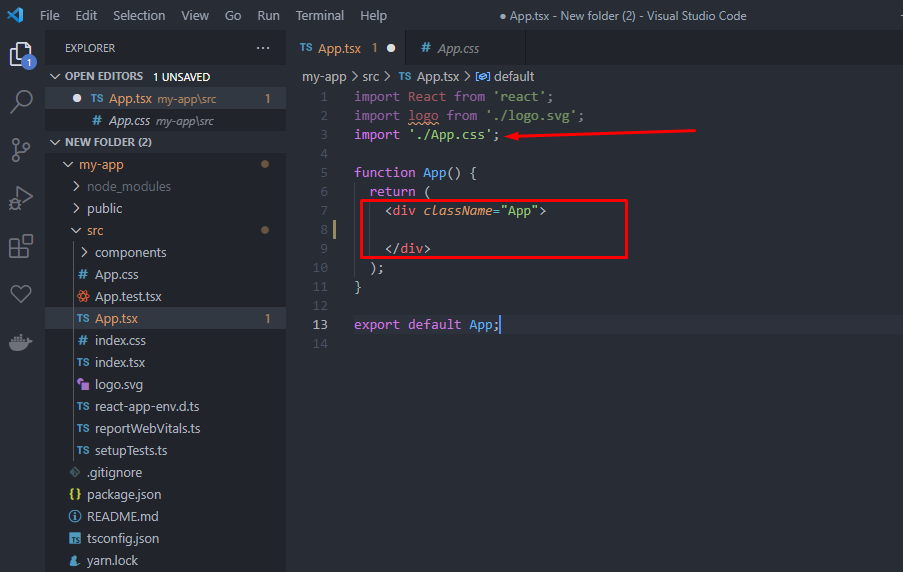
Next, we are going to create a components folder and where will store all the components for this project and we will also clear the content of the app.tsx file and only keep the container and also remove the content inside.
We will also be removing the app.css file as it will not to used.
We will create a new file in the component folder named newtodo.tsx,
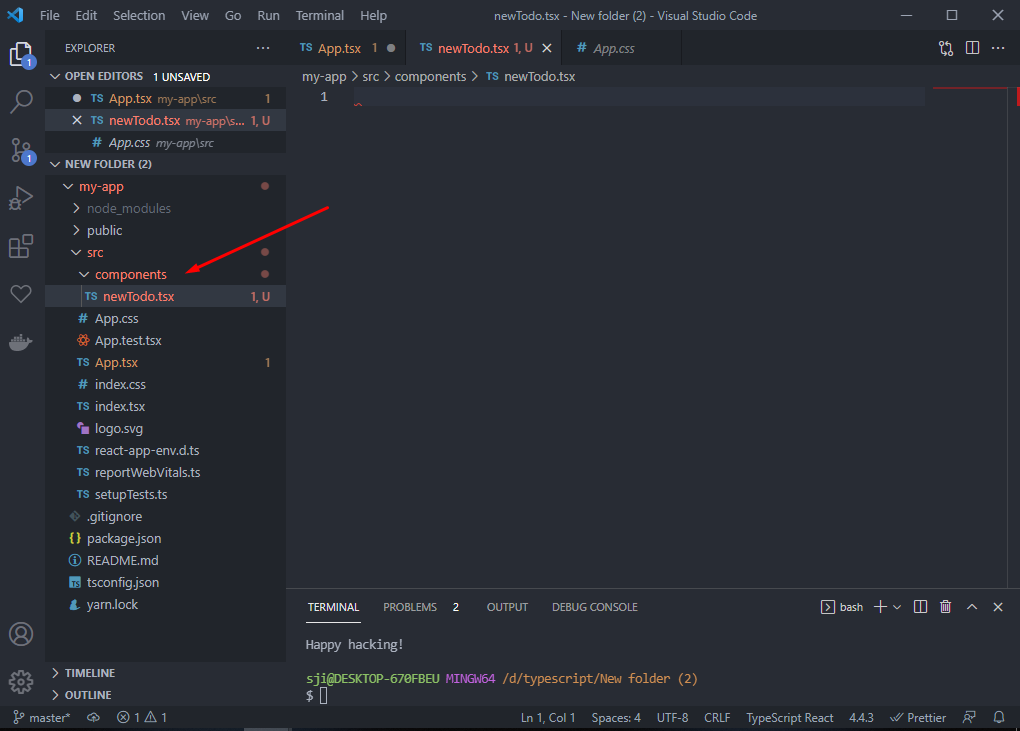
We will create a form for adding todo’s on the list
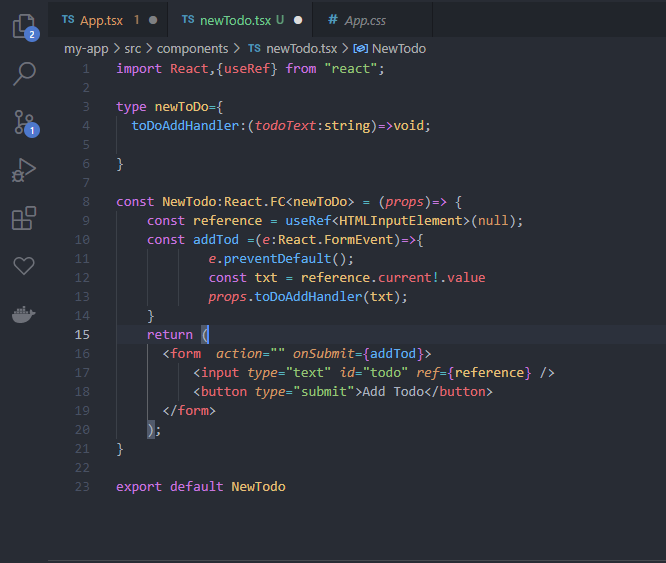
First, we will import the react library and useRef hook which will be used to get the form data
Next on line 3, we create a type called newToDo with a property toDoAddHandler
type newToDo={
toDoAddHandler:(todoText:string)=>void;
}
This will be used to tell typescript what type of data we will be expecting as props from the other component.
The toDoAddHandler is a function that is present in the app.tsx file which we will be sending as a prop to this component.
Next, we create a function component named NewTodo like blow
const NewTodo:React.FC<newToDo> = (props)=> {}
React.FC is a type that comes with react typescript template which tells what types of function it is, and the <newToDo> tells what to expect as props from the function.
React.FC has a generic type that means it will change to match your data type or data which we will be sending. I.e it is expecting items that we specify in the newToDo type we created. so it will be expecting a function named toDoAddHandler to be passed as props.
const reference = useRef<HTMLInputElement>(null);
const addTod =(e:React.FormEvent)=>{
e.preventDefault();
const txt = reference.current!.value
props.toDoAddHandler(txt);
}
Typescript provides a a type for HTML elements e.g
HTMLInputElement type for input element of any type like text, number, etc
HTMLUListElement type specifies that we are working with a UL element
And in the code, above we used one of those to tell what type of element we are working with.
This type helps in types script understanding and showing relevant methods which are present for the element.
Next, we set up a useRef() hook, in typescript the useRef() hook has a generic type and
<HTMLInputElement> is used to specify the type of element we will be getting to the function.
And after that it is the form of our application where our user will add todo items and submit the form, onSubmit it is linked to the function which will be called everything we submit the form, and in the form, we have also linked the input element to the useref hook
return (
<form action="" onSubmit={addTod}>
<input type="text" id="todo" ref={reference} />
<button type="submit">Add Todo</button>
</form>
);
We will now create the component for listing out the
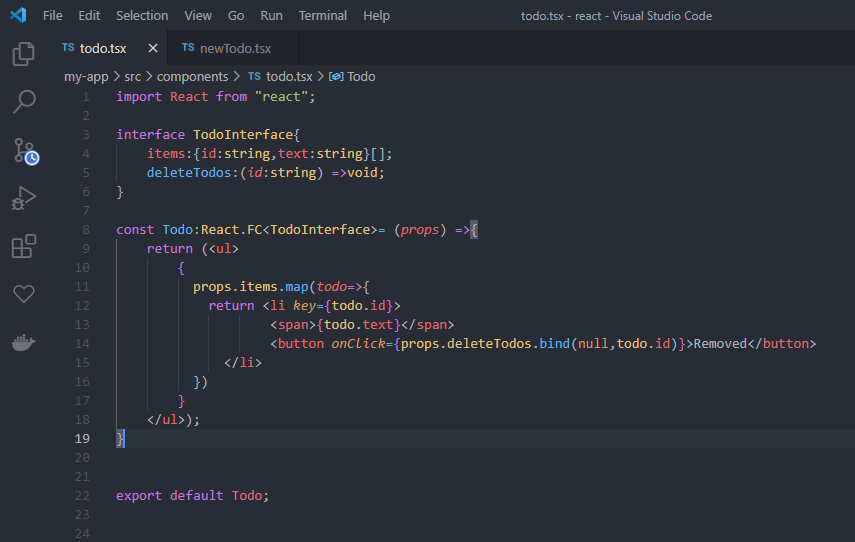
The code is similar to the existing component, here we created an interface to tell typescript what function/data will be coming as props
Here we are going to take an array of elements and render a list of todo’s using the map function and li element and we are returning an unordered list.
interface TodoInterface{
items:{id:string,text:string}[];
deleteTodos:(id:string) =>void;
}
The interface tells that we will be expecting items array which will contain objects with key id and text and a deleteTodos function which will be linked to the list of items
The next code takes the data and creates a list and after creating it returns the list to the main component
const Todo:React.FC<TodoInterface>= (props) =>{
return (<ul>
{
props.items.map(todo=>{
return <li key={todo.id}>
<span>{todo.text}</span>
<button onClick={props.deleteTodos.bind(null,todo.id)}>Removed</button>
</li>
})
}
</ul>);
}
export default Todo;
The App Component
The app component is the main component where the form and the list of items will be will be integrated and will be shown to the user
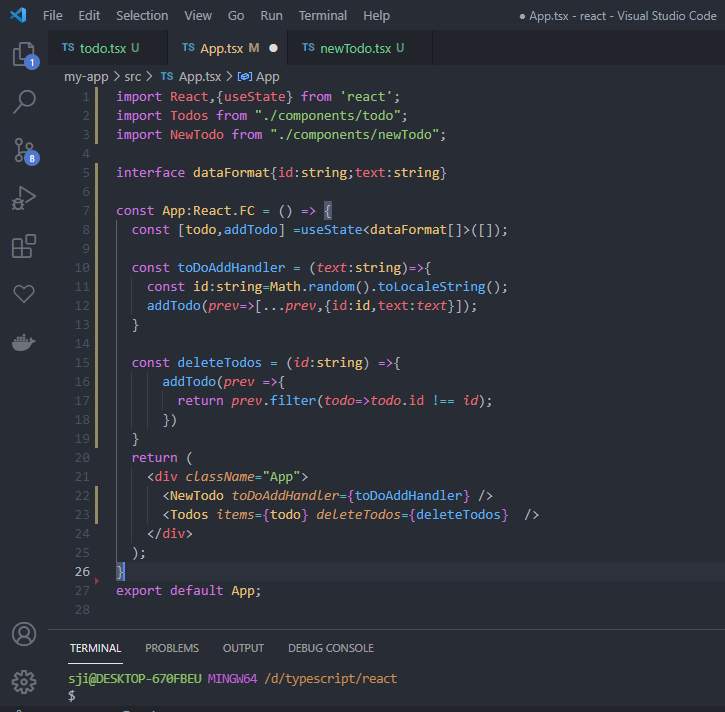
First, we import the libraries and the component which will be used in our app
import React,{useState} from 'react';
import Todos from "./components/todo";
import NewTodo from "./components/newTodo";
Then we will create an interface with the property id of type string and text of type sting
interface dataFormat{id:string;text:string}
Next is the main app function, the start of our program
Here we specified App of type React.FC (react function) .
const App:React.FC = () => {
Then we set up a useState hook and give it the dataFormat type and specify it as an empty array and used destructuring to make todo state and addtodo function.
const [todo,addTodo] =useState<dataFormat[]>([]);
Next, we create a toDoAddHandler function which will add the todo which the user submits to the state it will accept a text which will be the todo user added.
Here we generate a random id using Math.random().toLocaleString()
And then assign it to the state using the addtodo function
const toDoAddHandler = (text:string)=>{
const id:string=Math.random().toLocaleString();
addTodo(prev=>[...prev,{id:id,text:text}]);
}
Next is the deleteTodos function which will accept an id and then filter the todo item list/state to find a todo with a given id and remove it from the list
const deleteTodos = (id:string) =>{
addTodo(prev =>{
return prev.filter(todo=>todo.id !== id);
})
}
Next is the jsx for the component which will take the two-component we created. We will pass the function we created to the appropriate component as a props
return (
<div className="App">
<NewTodo toDoAddHandler={toDoAddHandler} />
<Todos items={todo} deleteTodos={deleteTodos} />
</div>
);
}
export default App;
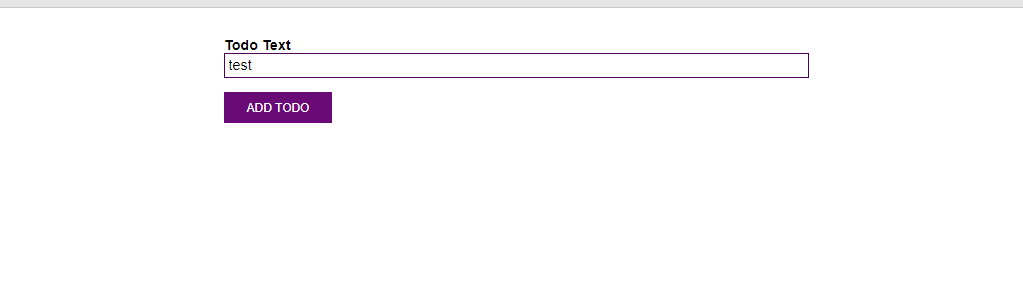
After this, we can add styles to the elements as desired

After adding the styles and running the project it should look like this, This is the form where the user will add items to the list.
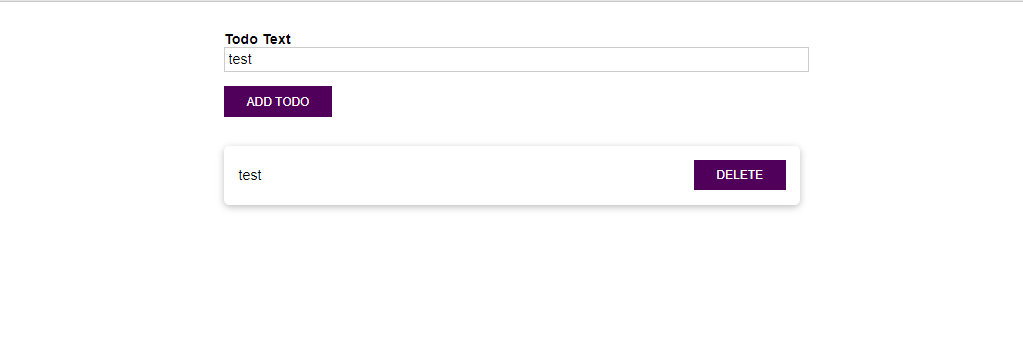
Once the item has been added it will appear in the list and the user can delete the item by clicking on the link


Software Development Agency Tips: Boost Revenue with New Platforms

Xcode 9 Custom Templates